Design Hierarchy
In JITX, we can think of an electronic circuit as a hierarchical graph of components and modules. We call this graph the circuit graph. Understanding the circuit graph is critical to understanding how the code, schematic, and board work together in a complete design.
This hierarchical graph concept is a pretty common trait in many CAD tools. Just to name of few:
- Tools like Unity and Blender use a Scene Graph to arrange models, cameras, and other objects.
- Solidworks uses a Design Tree for capturing the relationships between components and assemblies.
Most ECAD tools have this kind of hierarchical graph as well but the schematic capture tools can make it a bit more opaque.
- For many tools, each schematic sheet is an implicit "module" of the design.
- Multiple sheets are combined together to form a complete design.
- Multiple circuits might end up on one sheet that might otherwise be better off as independent modules.
- Coming from Altium, you will probably be familiar with multi-channel hierarchical designs.
Modules
The circuit graph consists of two main types of nodes:
- Module nodes - pcb-module - can be thought of as sub-circuits.
- Component nodes - pcb-component - represent physical or virtual electronic components.
Note, that we're not using circuit here in the graph theory definition of the word circuit -- more in the "Sparkies make electrical circuits" definition of the word circuit.
FPGA Designers - The following will likely feel pretty familiar to you. Whether you are coming from VHDL, Verilog, or others, the modular structure of a design in JITX will mimic the structural architecture of many HDL designs.
Instances and Instantiables
Each of the pcb-module or pcb-component statements in a design can be thought of as the definition for a sub-circuit or component, respectively. We call these Instantiable types. Each Instantiable can be processed to form an Instance type. The Instantiable is the recipe and the Instance is the rich chocolate soufflé made from that recipe.

The root node of the circuit graph will always be an instance of a pcb-module. The root node will be the parent of any number of child nodes, be they pcb-module instances or pcb-component instances. The pcb-component instances are always going to be leaves of that tree - they will never be the parent of any other instances.
Instances are constructed inside a pcb-module with the inst statement:
pcb-component NE555:
  ...

pcb-module top-level:

  inst timer : NE555

; ^^^^------------------- JITX Keyword for Instantiation
;      ^^^^^------------- Symbol Name of the constructed Instance
;              ^^^^^----- Instantiable (recipe) for this Instance
Here we construct an instance of the NE555 Instantiable. In this example, NE555 is a component, but it could just as easily have been a module. The instance is named timer which is a symbol in the top-level module context.
InstanceTypes
When constructing an Instance from an Instantiable, each instance can be one of 3 types:
SingleComponent- An instance constructed from apcb-componentSingleModule- An instance constructed from apcb-moduleInstanceArray- An array of instances constructed from eitherpcb-componentorpcb-moduledefinitions.
To determine what type a particular symbol is, we would call the instance-type function. In the previous NE555 example, calling instance-type on timer would return SingleComponent
InstanceArray
In the previous NE555 example - we constructed a SingleComponent instance. To construct an InstanceArray type, we would add a [...] suffix:
pcb-component NE555:
  ...

pcb-module top-level:

  inst timers : NE555[4]

; ^^^^-------------------- JITX Keyword for Instantiation
;      ^^^^^^------------- Symbol Name of the constructed Instance
;               ^^^^^----- Instantiable (recipe) for this Instance
;                    ^^^-- Instance Array Parameters
In this example, we construct an InstanceArray type of instance. In this case, the array contains 4 distinct SingleComponent instances of the NE555 Instantiable. This array functions similar to an array in C with zero-based indexing.
val symb-type = instance-type(timers)
println("Array: %_" % [symb-type])
val elem-type = instance-type(timers[0])
println("Single: %_" % [elem-type])

; Prints:
; Array: InstanceArray
; Single: SingleComponent
Attempting to access an InstanceArray with a negative index or an index outside the arrays bounds will result in an exception.
Labeling the Circuit Graph
As we peruse the circuit graph, we need a way to uniquely label instances at arbitrary depth in the graph. We accomplish with a . (dot) notation similar to attribute notation in Python. Let's say we have a hypothetical instance audio in our current context:
audio.pre-amp[1].op-amp.vout
This line demonstrates a dot-path label that uniquely identifies a particular object. For example, this label might indicate the following structure:
 - audio          =>  Module
   |
   -- pre-amp[0]  =>  Module
   |  |
   |  -- op-amp   =>  Component
   |     |
   |     -- vout  =>  Pin
   |
   -- pre-amp[1]  =>  Module
      |
      -- op-amp   =>  Component
         |
         -- vout  =>  Pin
   ...
dot notation combined with array indexing allows us to uniquely identify every module, component, pin/port, etc in the circuit graph.
These dot notation strings are called refs.
Acyclic Circuit Graph
The circuit graph is primarily a means of describing the "ownership" of component and modules nodes. It is not describing the interconnection between components or modules.
Because this graph is describing hardware, there are no cycles in this graph. In other words, the circuit graph is acyclic. Again - this is not suggesting that the net list is acyclic - only the circuit graph. Cycles in the net list or component connections are of course possible for things like feedback, oscillators, etc.
Example - Invalid Circuit with Cycle
pcb-module A :
  inst U : B

pcb-module B :
  inst W : A

pcb-module top-level:
  inst Z : A
In this example, The module A instantiates module B and vice versa. This creates a cycle and this is not allowed.
Modules in the Schematic
The circuit graph plays an important role schematic visualization as well.
Each pcb-module has an implicit schematic-group statement. All of the child component/sub-module instances of a module are added to that schematic group by default. This implicit, per-module schematic group provides a reference point - dare we say, a grounding - between code text and visual schematic medium.
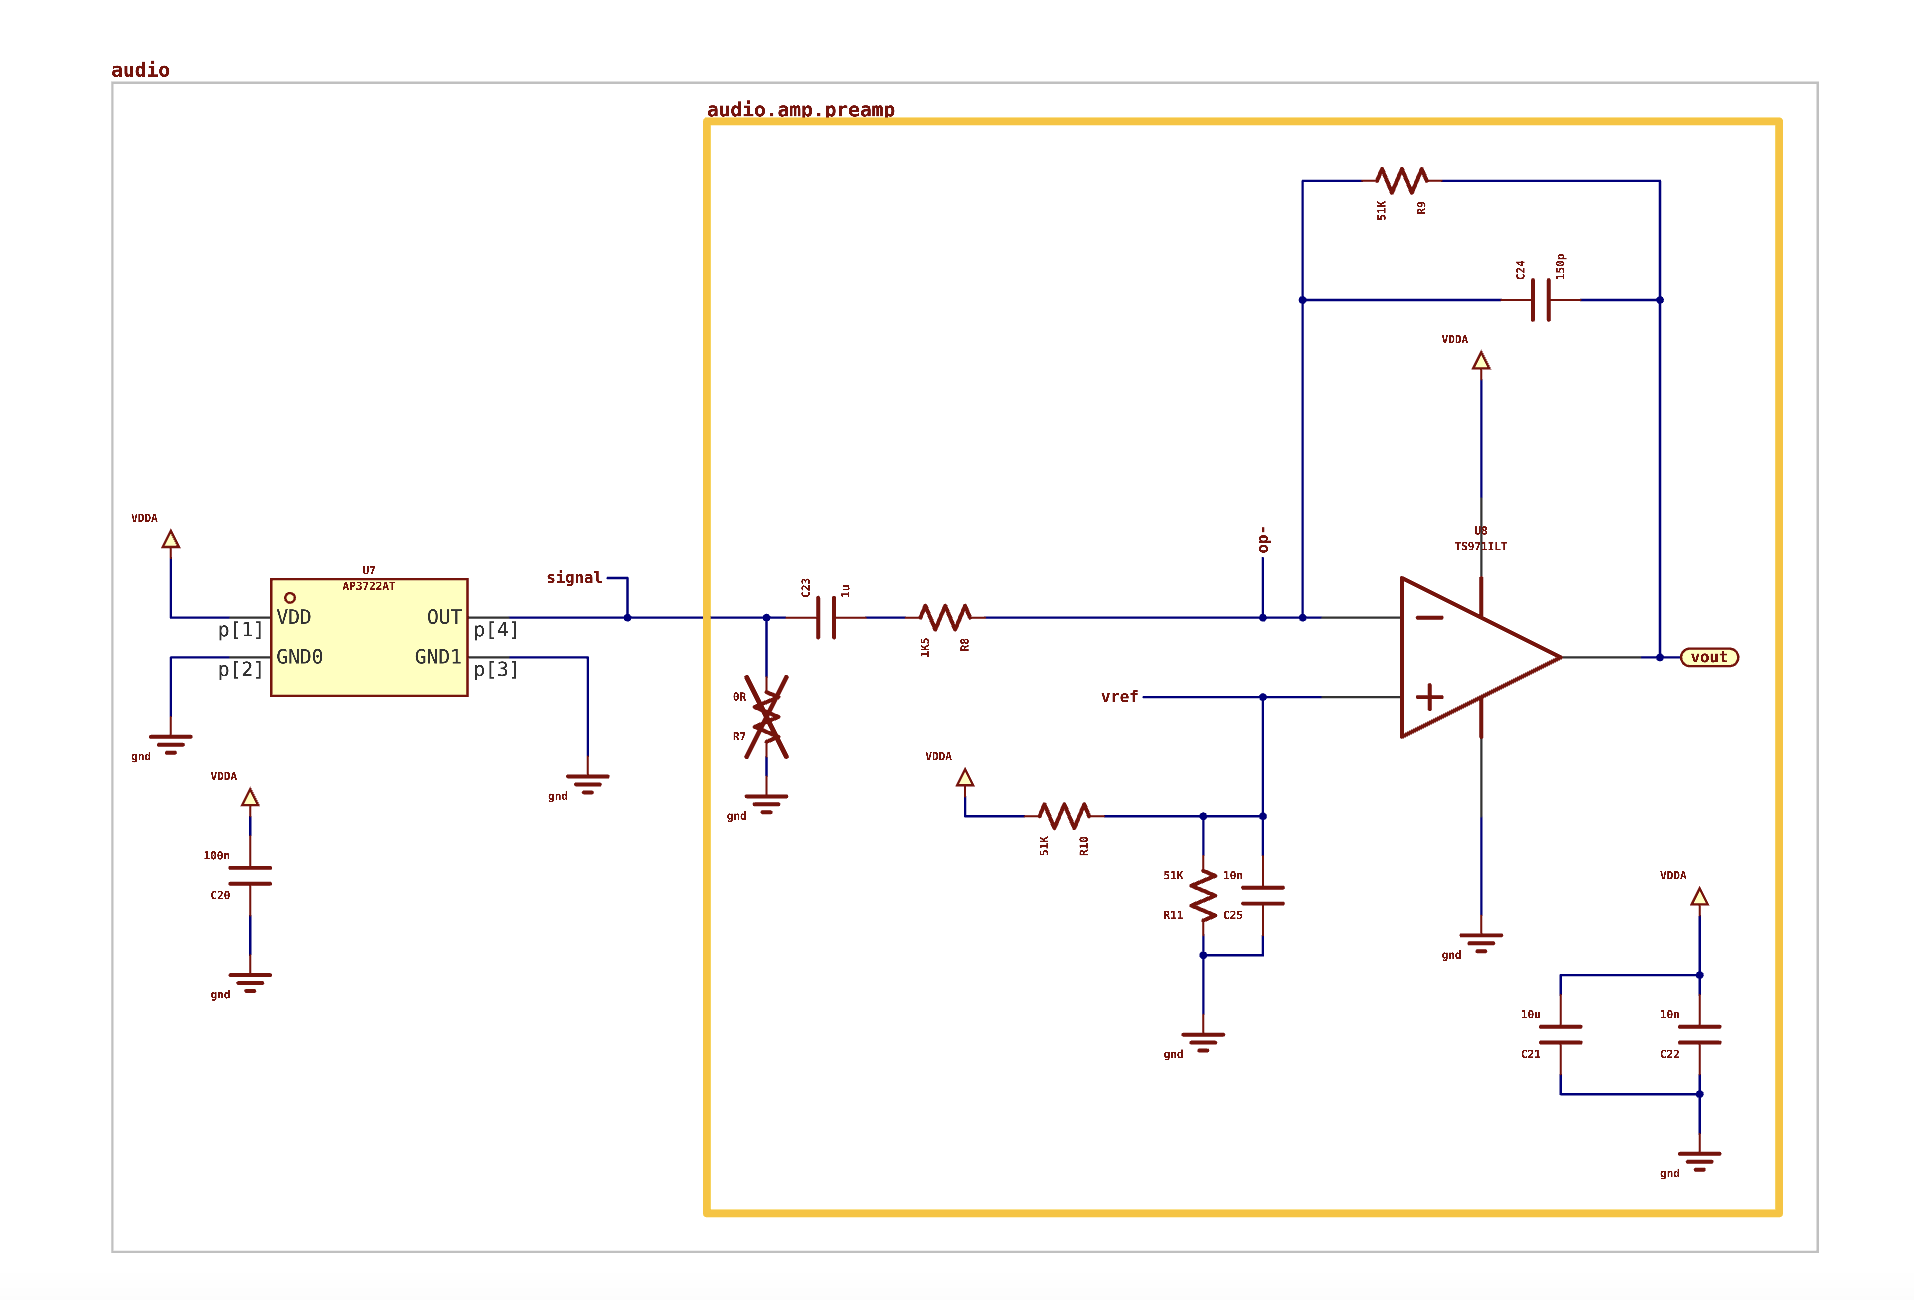
Schematic groups are method of organizing our schematic sheets with like circuits. They also provide a natural boundary between circuits that are not intended to interact.
In the image above, notice that the schematic groups are labeled with the same dot notation labeling as the modules. This makes it mapping the schematic groups to the code easier for debugging.
Introspecting the Circuit Graph
Once constructed, it is often useful to walk this graph to inspect parts of the circuits, add checks, or make connections in an automated way. There are several functions that support this kind of introspection:
These functions are variations on same concept - they allow us to iterate through the children of a pcb-module. The important thing to note is that they are not recursive(!). They will only provide references to the direct children of the passed instance.
Example - Recreating component-instances
As a beginning exercise, we can recreate the component-instances function in pure stanza:
public defn my-component-instances (mod:JITXObject|Instantiable) -> Seq<JITXObject> :
  generate<JITXObject>:
    for child in instances(mod) do:
      if instance-type(child) is SingleComponent:
        yield(child)
Example - Recursive Instances
Note - This is a more advanced example with recursion. Fear not brave electro-adventurer - These examples will serve you well as you become more comfortable with the JITX Environment.
doc: \<DOC>
Generate a recursive sequence of all child components/modules

This function expands `InstanceArray` by serving each individual
instance as an element in the returned sequence.
<DOC>
public defn instances-rec (mod:JITXObject|Instantiable) -> Seq<JITXObject> :
  generate<JITXObject>:
    for child in instances(mod) do:
      match(instance-type(child)):
        (s:SingleComponent|SingleModule): yield(child)
        (a:InstanceArray):
          for i in instances-rec(child) do :
            yield(i)
In this function, we can pass either a module instance (JITXObject) or a module definition (Instantiable) and this function will produce a
sequence of JITXObject instances.
This function uses a stanza generator construct which is similar to Python generators.
Notice that this example uses a match statement instead of an if/else clause like the previous. This is a common, idiomatic pattern in Stanza.
The type SingleComponent|SingleModule matches on either SingleComponent or SingleModule
Because the graph is acyclic, we are guaranteed that this recursive function will exit.