Schematic View#
The Schematic View in JITX provides a visual and interactive interface to arrange and manage your schematics.
Toolbar#

The Toolbar in the Schematic View includes buttons for adjusting zoom, switching design views, and more. Below is a breakdown of the available commands:
Toolbar Commands#
Icon |
Description |
|---|---|
|
Fit the sheet’s contents to the screen. |
|
Toggle the page panel open and closed. |
|
Open the schematic view in a new window. |
|
Toggle the progress report panel open and closed. A red circle indicates detected issues. |
|
Toggle the hotkey panel open and closed. |
Page Panel#
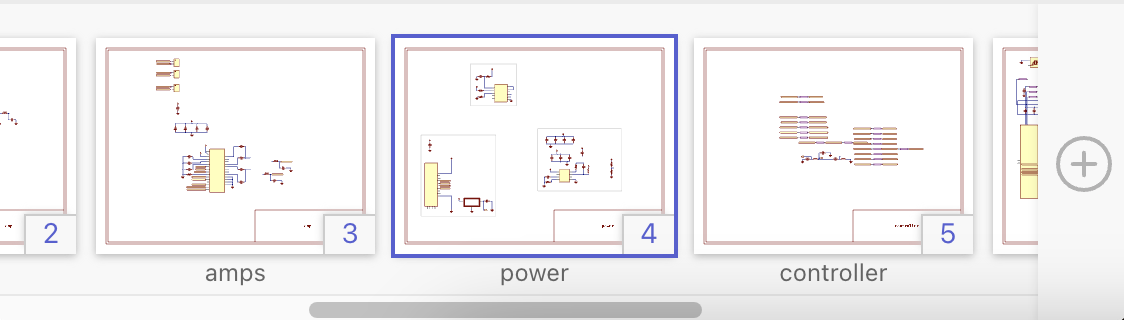
The Page Panel shows thumbnails of all schematic pages in your design, along with their sheet names and indexes. Click a thumbnail to switch to that page’s view. The panel scrolls horizontally when there are more pages than can fit on the screen.
Edit Sheet Title#
To edit a sheet title, click on the ‘Edit’ popup that appears when hovering over a thumbnail, then enter a new title in the menu.
Add Page#
Click the ![]() icon at the right end of the panel to add a new page after the currently selected page.
icon at the right end of the panel to add a new page after the currently selected page.
Delete Page#
Click the ![]() icon on empty pages in the panel to delete the page.
icon on empty pages in the panel to delete the page.
Progress Report Panel#
The Progress Report Panel shows overlaps detected in your design. When the panel is open, the schematic view displays overlapping objects in red. Overlaps are categorized into three types:
Component Overlaps: Two or more components overlap.
Wire Overlaps: Wires intersect. While wire overlaps do not change connectivity in JITX, they may affect connectivity in other CAD tools when exported.
Mixed Overlaps: Issues involving both components and wires.
To review an overlap:
Hover: Highlights the affected area in yellow on the current sheet.
Click: Selects the smallest component involved in the overlap. If the objects are on a different page, the sheet thumbnail briefly flashes yellow.
Double-click: Fits the screen to view all overlapping objects and switches to the appropriate page if needed.